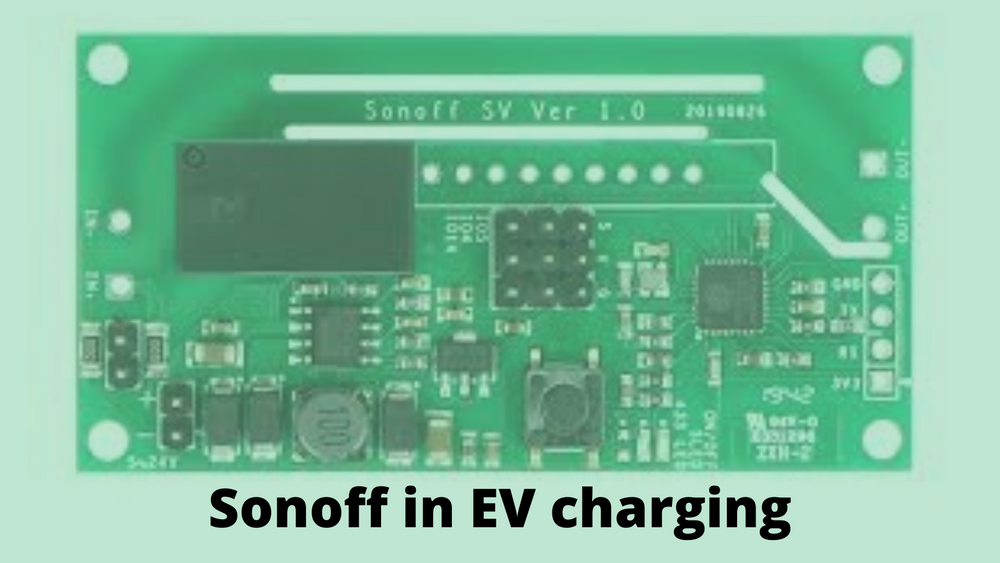
Sonoff in EV charging
Hello People. This article discusses about Sonoff in EV charging. You can convert a simple AC charging point to WiFi enabled one by using Arduino Pro Mini and Sonoff SV Wifi relay.
In this way, you get the possibility of activating charging point from anywhere as long as you got access to internet. Also you get standard Sonoff functions like day timer, countdown timer and delayed activation. It does not require any altering of high voltage side on your charging point.

When Sonoff relay is inactive, pilot signal is interrupted. As a result charging activation is impossible until relay is activated by user. Arduino board is used to monitor pilot signal and Sonoff relay to deactivate charging if plug was not connected to vehicle in 20 seconds after activation, or 1 second after it was disconnected from vehicle.
Are you looking to start your business in the electric vehicle industry? We provide software development, web application development, mobile application development, charging stations management app, electric vehicle fleet management software development, cyber security and all software services. Please check our home page here https://iwheels.co/

Ok. Let's get back to the article.
This makes sure that it won't be left activated if you activated by mistake or forgot to deactivate after the charging is compete. Also prevents an unauthorized use of a charging point without your knowledge.
Basic hardware required for this conversion project is:
Sonoff SV board
Arduino Pro Mini board
5V power supply unit
20kOhm resistor
3.3kOhm resistor
BC849 transistor (code for SMD transistor: 2C) or any other general purpose NPN Transistor
Thin wire
Connect your Arduino board to Sonoff SV board. Arduino pins: 2 - relay deactivation signal, 7 - EVSE pilot signal state detection, 8 - relay state detection. Cut the pilot signalwire in your charging station, connect it to your Sonoff board as and connect power feed to Arduino and Sonoff boards. Make sure your 5V power supply is strong enough. Use at least 1A 5V power supply.
Copy this code to your Arduino IDE and program your Arduino board
int status = 0; // connection to EV status;
int i = 0;
int n = 0;
int k = 0;
const long interval = 500;
void setup()
{
Serial.begin(9600);
pinMode(8, INPUT); // relay state detection; LOW-relay on, HIGH-relay off;
pinMode(2, OUTPUT); // relay deactivation impulse (HIGH);
pinMode(7, INPUT); // EVSE pilot state detection;
digitalWrite(2, LOW);
}
void loop()
{
if (digitalRead(8) == HIGH) {
delay(200);
status = 0;
}
k = 0;
while ((digitalRead(8) == LOW && digitalRead(7) == HIGH) && status == 0) {
for (i = 1; i <= 40; i += 1) {
scan();
if (k == 1){
break;
}
if (i == 40) {
digitalWrite(2, HIGH);
delay(500);
digitalWrite(2, LOW);
delay(1000);
}
}
}
if (digitalRead(8) == LOW) {
delay(200);
status = 1;
}
k = 0;
while ((digitalRead(8) == LOW && digitalRead(7) == HIGH) && status == 1) {
for (n = 1; n <= 2; n += 1) {
scan();
if (k == 1){
break;
}
if (n == 2) {
digitalWrite(2, HIGH);
delay(500);
digitalWrite(2, LOW);
delay(1000);
status = 0;
}
}
}
}
void scan(){
unsigned long currentMillis = millis();
while (millis() - currentMillis < interval) {
if (digitalRead(7) == LOW || digitalRead(8) == HIGH){
k = 1;
return;
}
}
}
Download EWeLink app, add your new device in to it by following Sonoff instructions, update Sonoff relay to the latest firmware and test your setup. Make sure your vehicles internal delayed charging timers are off.
Hope this article on Sonoff in EV charging is useful to you. Please read Using ESP8266 in Smart EV charging